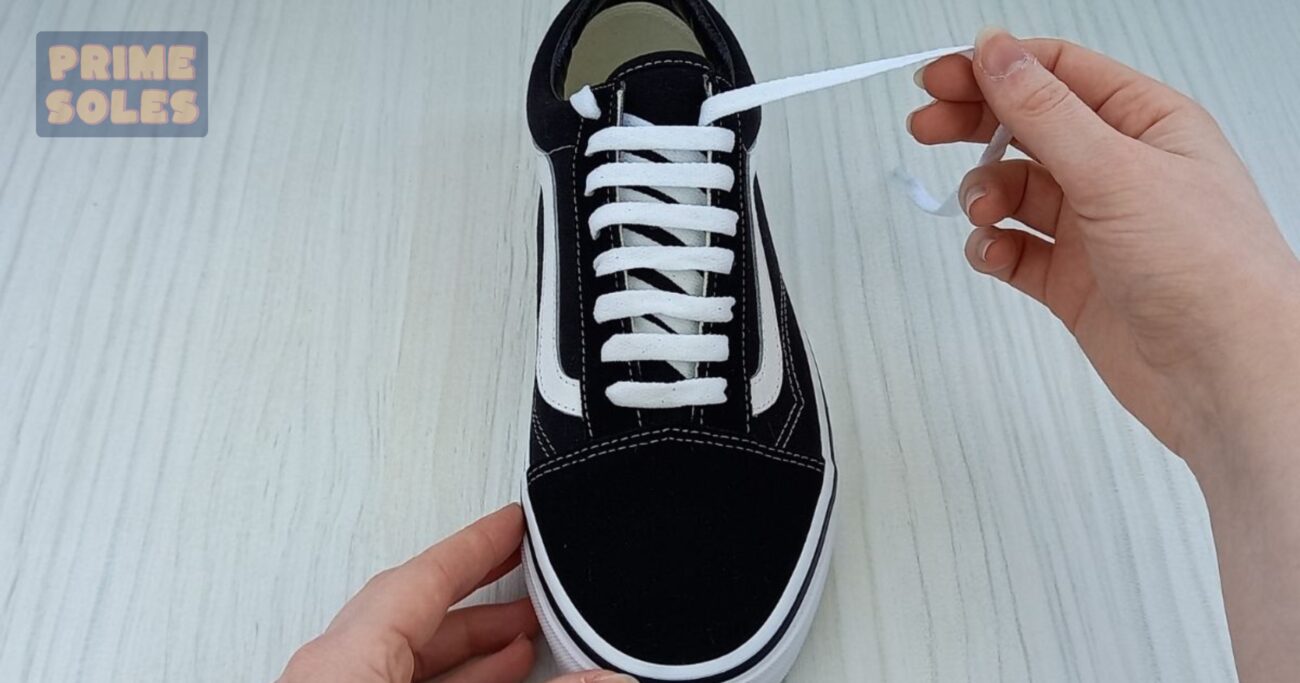
Shoelaces are a small yet integral part of any pair of shoes. They keep your feet secure, provide support, and can add a touch of personal style. Vans shoes are a favorite among enthusiasts, but many buyers need help with the proper technique for lacing them. By mastering the art of tying your laces, you’ll be able to enjoy the comfort and style of your Vans to the fullest. This article will guide you through putting shoelaces in your Vans shoes to get the most out of your footwear. So, whether you’re a seasoned pro or a new Vans shopper, read on to learn how to lace your Vans like a pro!

How to Put Shoe Strings in Vans: A Step-by-Step Guide
Shoelaces are a simple yet essential part of any pair of shoes. If you’re new to wearing Vans shoes or just looking to switch up your lacing technique, this guide will walk you through the process of putting shoelaces in your Vans.
Step 1: Gather Your Supplies

Before you start lacing your shoes, you’ll need a few basic supplies:
1: Your Vans shoes
2: A new pair of shoelaces, if needed
3: A flat surface to work on
Step 2: Remove the Old Shoelaces (if necessary)

If your Vans shoes have old, worn-out shoelaces, it’s time to replace them. To remove the old laces, loosen them and pull them out of the eyelets. If your laces are knotted, use scissors to cut them close to the knot.
Step 3: Measure the Length of the Shoelaces

The next step is to measure the length of the new shoelaces. To do this, place the lace in the eyelets and ensure enough length to tie a bow comfortably. If the shoelaces are too long, cut them to the desired length.
Step 4: Thread the Shoelaces through the Eyelets

With the length of the shoelaces determined, it’s time to thread them through the eyelets. Start at the bottom of the shoe and work your way up, making sure that the shoelaces are straight and evenly spaced.
Step 5: Lace the Shoes

Now that the shoelaces are in place, it’s time to lace them. You can use several lacing techniques, but the simplest and most common is the criss-cross pattern. To do this, cross one shoelace over the other, then pull it through the eyelet. Repeat this process until you reach the top of the shoe.
Step 6: Tie the Shoelaces

The final step is to tie the shoelaces. To do this:
1: Make a loop with one shoelace and then tuck the other shoelace through the loop.
2: Pull tight to secure the knot.
3: Repeat this process with the other shoelace, then adjust the laces to your desired tightness.
By following these simple steps, you’ll be able to put shoelaces in
Tips and Tricks for Putting Shoelaces in Vans
In addition to the step-by-step guide, here are some tips and tricks to make putting shoelaces in your Vans shoes even easier:
Tip 1: Experiment with Different Lacing Techniques
The criss-cross lacing technique is the simplest and most common, but it’s far from the only option. You can try different lacing techniques to find the one that works best for you. For example, the straight bar lacing technique is an excellent option for those who want a clean, minimalist look. The ladder lacing technique is another option that’s both stylish and functional.

Tip 2: Use the Right Shoelaces
Choosing suitable shoelaces can make a big difference in the comfort and style of your Vans shoes. Opt for high-quality, durable shoelaces that are the right length and width for your shoes. If you’re looking for something more personal, consider shoelaces with a fun pattern or a pop of color.

Tip 3: Keep Your Shoelaces Tied
One of the biggest challenges of wearing Vans shoes is keeping the shoelaces tied. To prevent your laces from coming undone, consider double-knotting them or using a locking technique, such as the Ian Knot.

Tip 4: Clean Your Shoelaces Regularly
Dirt, grime, and other debris can accumulate on your shoelaces, affecting their appearance and function. To keep your shoelaces looking their best, clean them regularly. You can wash them in a machine or by hand using mild soap and water.

By following these tips and tricks, you’ll be able to put shoelaces in your Vans shoes with confidence and style. Whether you’re a seasoned Vans wearer or a newcomer to the brand, you’ll be able to enjoy the comfort and versatility of your shoes to the fullest.
Video Guide
Conclusion
In conclusion, putting shoelaces in your Vans shoes is a simple yet essential task that can significantly enhance the comfort and style of your shoes. By following the step-by-step guide and incorporating the tips and tricks outlined in this blog, you’ll be able to lace your Vans like a pro. Whether you prefer a classic criss-cross pattern or a more elaborate lacing technique, you’ll enjoy the perfect fit and style of your Vans shoes every time you wear them. So, give it a try, and elevate your Vans game today!
FAQs
How do I restring my vans?
To restring your Vans shoes, you will need the following items:
1: A new pair of shoelaces
2: Scissors
3: A flat surface
Here is a step-by-step guide on how to restring your Vans:
1: Remove the Old Shoelaces: Start by unlacing your Vans shoes and removing the old shoelaces.
2: Measure the New Shoelaces: Hold the new ones up to your old ones to see how long they need to be. Cut the new shoelaces to the desired length, leaving a few extra inches on each end.
3: Lace the Shoes: Start lacing your Vans shoes by inserting one end of the shoelace into the bottom eyelet on one side of the shoe. Then, insert the other end of the shoelace into the bottom eyelet on the other side of the shoe.
4: Criss-Cross the Shoelaces: Cross the shoelaces over each other in a criss-cross pattern, working your way up the shoe. Make sure to tighten the shoelaces as you go.
5: Finish Lacing: Once you’ve reached the top of the shoe, insert the shoelaces into the top eyelets and tie a knot. You can use the basic knot or a locking knot, such as the Ian Knot, to prevent the shoelaces from coming undone.
Repeat for the Other Shoe: Repeat the process for the other shoe and make any necessary adjustments to ensure a comfortable fit.
By following these steps, you’ll be able to restring your Vans shoes quickly and easily. Enjoy your refreshed shoes!
How do you lace 4 holes in Vans?
Lacing four holes in Van’s shoes is a simple process that will give you a secure and comfortable fit. The process is similar to lacing any other shoes, with a few extra steps to accommodate the extra eyelets. Here’s how to lace four holes in Van’s shoes:
1: Start by threading one end of the shoelace through the bottom-left eyelet and tying a basic knot.
2: Next, take the other end of the shoelace and thread it through the bottom-right eyelet.
3: Cross the shoelaces over each other in a criss-cross pattern, working your way up the shoe.
4: When you reach the next set of eyelets, insert the shoelaces into the top-left and top-right eyelets.
5: Continue lacing the shoelaces in a criss-cross pattern, pulling the shoelaces tight as you go.
6: When you reach the top of the shoe, tie a basic knot or a locking knot, such as the Ian Knot, to prevent the shoelaces from undoing.
By following these steps, you’ll be able to lace your four-hole Vans shoes with confidence and style. Whether you’re a seasoned Vans wearer or a newcomer to the brand, you’ll be able to enjoy the comfort and versatility of your shoes to the fullest.
Do you tuck van laces in?
Yes, you can tuck the laces of vans into the sides for a cleaner look. Thread the ends of the laces into the sides and adjust them until they are snug and secure. This technique is often used for skaters and casual wearers who want a low profile and minimalist style.

